How to Plan Your Outdoor Kitchen Layout: A Step-by-Step Guide
Learn how to plan an outdoor kitchen layout that maximizes your space and workflow. Expert tips on the work triangle, zones, and traffic flow.
Michael Carter
Our professional service team sees the exact same issue in almost every backyard renovation project.
People rush to pick out grills and countertops without understanding how to plan your outdoor kitchen layout: a step-by-step guide is exactly what they need.
This backwards approach almost always guarantees a cramped cooking experience.
We know that a highly functional space requires matching concrete data with your specific cooking habits.
The difference between a stressful cookout and a seamless event lies entirely in those initial measurements.
Detailed planning ensures your setup works perfectly from day one.
Our step-by-step process breaks down the core layout strategies you need to master.
Step 1: Assess Your Available Space
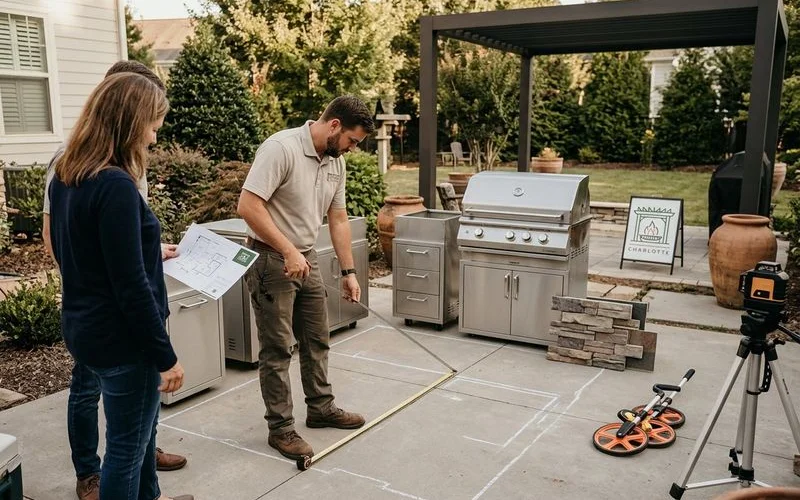
Our initial consultations always begin with a measuring tape.
You need a clear understanding of the space you are working with before shopping for grills or browsing countertop samples.
Obstacles like downspouts, HVAC units, trees, or slopes will dictate your placement options.
We recommend documenting the exact dimensions of your patio, deck, or yard area.
In Charlotte, established neighborhoods like Dilworth, Elizabeth, and Eastover often feature irregularly shaped lots or mature trees. As Charlotte outdoor kitchen experts, we navigate these challenges daily.
New construction communities in areas like Harrisburg, Indian Trail, and Fort Mill provide uniform lot shapes but carry strict HOA setback requirements.
Our team relies on a few key environmental factors to place appliances correctly.
The National Kitchen and Bath Association (NKBA) guidelines state that all primary walkways must be at least 36 inches wide.
Summer winds in Charlotte typically blow from the southwest.
We strongly advise positioning your heat-producing appliances so that smoke drifts away from seating areas.
You must mark the location of your back door, existing hardscape, and prevailing winds.
Proper planning protects your guests from uncomfortable drafts.
Our designers map these elements before drawing a single line.
Essential Site Plan Elements
- Clear Walkways: Maintain that minimum 36-inch clearance for safe movement.
- Sun Exposure: Track where the harsh afternoon sun hits to plan for shade structures.
- Wind Direction: Map the southwest summer breezes to manage grill smoke.
- Utility Access: Note the distance from the main house to potential gas and water lines.
Step 2: Define Your Cooking and Entertaining Style
We always ask clients to be completely honest about how they intend to use their new space.
Your layout should reflect your actual cooking habits rather than mimicking a pristine showroom.
The 2025 International Casual Furnishings Association (ICFA) survey reveals that 59 percent of households plan to purchase new outdoor accessories, indicating a massive shift toward high-frequency backyard entertaining.
Our goal is to ensure your setup can handle that high volume.
A casual griller requires a completely different equipment list than a serious smoking enthusiast.
You need to decide if you are hosting intimate dinners for four or throwing massive tailgate parties every weekend.
We look at current market data to help finalize these choices.
The 2026 NKBA Kitchen Trends Report highlights that 71 percent of homeowners are actively seeking a stronger outdoor connection through enhanced seating and serving zones.
Planning for your maximum guest count prevents bottlenecks around the food prep areas.
”Designing for your peak capacity ensures your patio never feels crowded during those busy summer holiday weekends.”
Our layouts allocate specific square footage for guests to gather based on this data.
You should match this trend by keeping visitors engaged but safely out of the workflow.
These entertaining spaces sit slightly away from the active cooking surfaces to protect your visitors from heat and smoke.
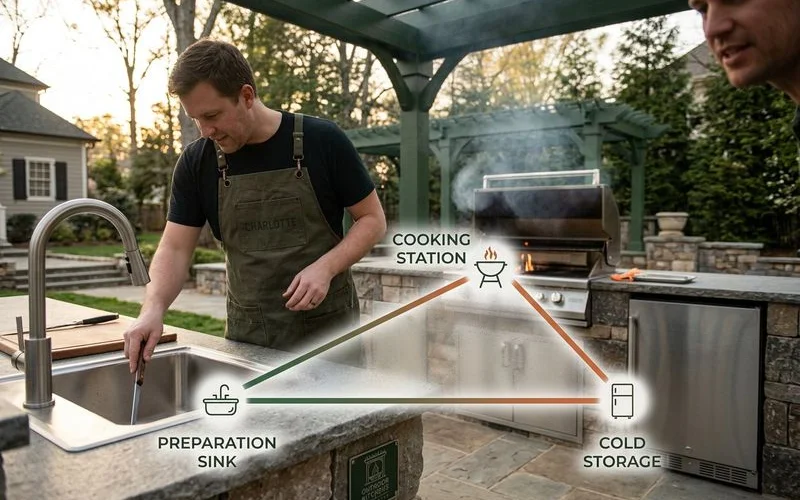
Step 3: Understand the Outdoor Kitchen Work Triangle
We use the updated 2026 NKBA layout guidelines as our exact mathematical standard for the work triangle.
This concept connects your primary cooking surface, your prep area, and your sink.
The total perimeter of these three points must never exceed 26 feet.
Our designers keep the distances tight to minimize unnecessary steps while carrying heavy trays of meat.
Each individual leg of the triangle should measure between four and nine feet.
Stretching the triangle any further makes the space feel exhausting to move through.
We frequently see homeowners make the mistake of placing the grill right next to the patio entrance.
A tight, protected path allows you to pull items from the refrigerator and move to the grill without crossing a traffic zone.
You must keep the hot zones isolated from your main house door.
Our standard practice is to position the prep counter squarely between the cold storage and the cooking surface.
This logical progression creates a smooth, safe culinary workflow.
Professional chefs rely on this exact sequence for speed and safety.
The Three Points of Efficiency
- The Heat Source: Grills, smokers, and pizza ovens.
- The Cold Storage: Refrigerators and ice makers.
- The Clean-up Station: Sinks and trash pull-outs.
Step 4: Plan Your Zones
We divide every project into distinct functional zones to maximize utility.
A modest footprint still needs dedicated spaces for cooking, prepping, serving, and storage.
The cooking zone houses your grill, side burners, and pizza ovens.
Our installation crews position this hot area downwind on the south or west side of Charlotte properties.
Core Functional Zones
- The Cooking Zone: Keep grills and smokers clustered together and properly ventilated.
- The Prep Zone: Provide a minimum of 36 inches wide by 24 inches deep of continuous countertop space adjacent to the sink.
- The Serving Zone: Create a dedicated landing area with 15 inches of clearance near the refrigerator for quick drink access.
- The Storage Zone: Install weather-tight cabinets and drawers to hold utensils and cleaning supplies.
We prioritize generous, uninterrupted counter space for food preparation.
The NKBA strictly recommends having at least 36 inches of continuous width right next to a water source.
A proper landing area makes slicing vegetables and seasoning steaks incredibly convenient.
Our designs incorporate small sinks to eliminate frustrating trips back inside the main house.
Having cold water on hand speeds up the cleaning process immensely.
Dedicated trash pull-outs keep the entire area looking pristine during a party.
Step 5: Consider Utility Connections
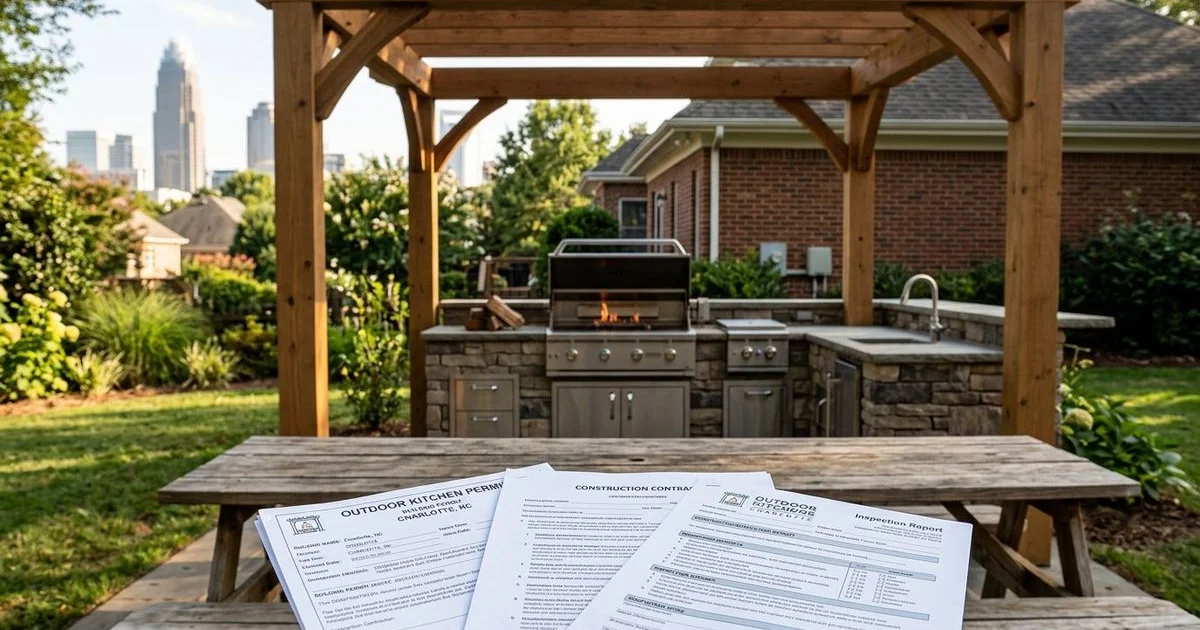
We cannot stress enough how critical it is to map out your utilities before pouring any concrete.
Natural gas, water, and electricity form the invisible backbone of your new entertaining space.
Running a permanent gas line requires a licensed plumber and an official permit from Mecklenburg County.
Our advisors tell clients to budget between 500 and 2,000 dollars just for the gas line trenching and connection.
Essential Utility Requirements
- Natural Gas: Provides uninterrupted fuel for heavy-duty grills without the hassle of swapping propane tanks.
- Plumbing: Requires hot and cold supply lines, plus a proper drain tied into your home system.
- Winterization Valves: Essential in North Carolina to drain pipes before freezing winter temperatures hit.
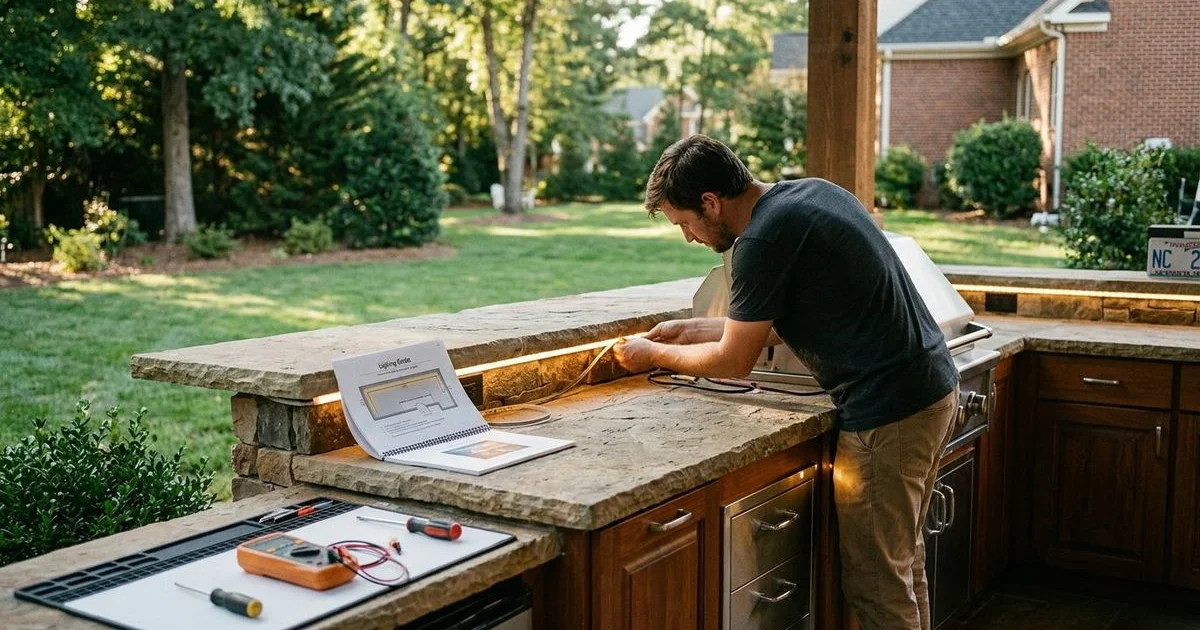
- Electrical Power: Must comply with strict outdoor safety codes for all lighting and appliances.
We plan these electrical requirements early so conduit can be run beneath the patio surface.
Section 210.8(F) of the 2023 National Electrical Code (NEC) mandates that all outdoor receptacles rated at 50 amps or less feature GFCI protection.
Retrofitting wires after the stone is laid is an expensive and messy nightmare.
Step 6: Choose Your Layout Shape
Our team offers several classic configurations to fit different yard dimensions.
The five most common shapes are linear, L-shaped, U-shaped, G-shaped, and freestanding islands.
A linear layout works beautifully against a single wall to keep plumbing and gas runs short.
We typically recommend this straight-line approach for narrow spaces and conservative budgets.
This versatile shape adds crucial counter space and naturally forms the perfect work triangle.
Adding a peninsula to create a G-shape provides an excellent built-in seating bar.
Our custom builds include large U-shaped setups for serious chefs who need maximum storage capacity.
| Layout Shape | Ideal Yard Type | Key Benefit | NKBA Seating Clearance Metric |
|---|---|---|---|
| Linear | Narrow patios or small decks | Cost-effective and easy utility access | Best paired with a separate dining table |
| L-Shaped | Medium to large square yards | Excellent workflow and corner utilization | Perfect for a short dining peninsula |
| U-Shaped / G-Shaped | Expansive, dedicated entertaining areas | Maximum storage and appliance capacity | Requires 15-inch knee depth for a 36-inch high counter |
| Freestanding Island | Poolside spaces or central patios | Creates a centralized social hub | Requires 12-inch knee depth for a 42-inch high bar |
We ensure all bar seating meets established ergonomic standards.
The NKBA guidelines require specific knee clearances depending on the height of the counter.
Taller 42-inch bar tops require a 12-inch depth for optimal legroom.
Our builders create 36-inch high counters with a 15-inch deep knee space to keep guests comfortable.
Proper legroom prevents visitors from banging their knees against the stone facade.
Comfortable seating encourages friends to linger longer while you cook.
Step 7: Account for Charlotte’s Climate
We always design with local weather patterns firmly in mind.
Summer temperatures in North Carolina regularly push into the mid-90s with oppressive humidity.
A reliable shade structure like a pergola or a pavilion is absolutely essential for daytime comfort.
Our material recommendations focus heavily on corrosion resistance to combat these conditions.
Climate-Ready Design Choices
- Shade Structures: Pergolas and awnings block harsh UV rays.
- Marine-Grade Metals: Upgraded steel prevents rapid rusting in high humidity.
- Heating Elements: Fire pits and infrared heaters extend the season into late fall.
- Strategic Drainage: Sloped concrete prevents standing water after sudden storms.
We use heavy-duty materials that can withstand severe afternoon thunderstorms and occasional tropical remnants.
The standard choice for appliances is 304-grade stainless steel, but humid climates sometimes demand an upgrade.
This premium 316 marine-grade alloy contains two to three percent molybdenum, which provides vastly superior protection against moisture and chemicals.
Our specialists often specify 316 stainless steel for clients who want the ultimate durability.
A well-placed fireplace or a series of heat lamps extends the usability of your space year-round during the milder winter months.
Proper yard drainage is another critical step to prevent water from pooling around the seating areas during heavy rains.
Putting Your Plan Into Action
We know that a detailed blueprint saves money and prevents construction delays.
Taking the time to execute how to plan your outdoor kitchen layout: a step-by-step guide guarantees a smooth building process.
You end up with a highly functional space that works exactly the way you need it to.
Our team is ready to help when you want to move from the planning stage to actual construction.
Professional custom outdoor kitchen design services make an enormous difference for Charlotte homeowners.
Accurate 3D renderings and precise construction drawings bring your exact vision to life.
We turn your empty yard into a beautiful, high-performance cooking destination.
Michael Carter
Outdoor Living Design Specialist
15+ years designing outdoor kitchens across Charlotte, NC.